Perfect Peanut Butter Blossoms: Smart Ingredient Choices & Dough Tips
For many, the mere mention of
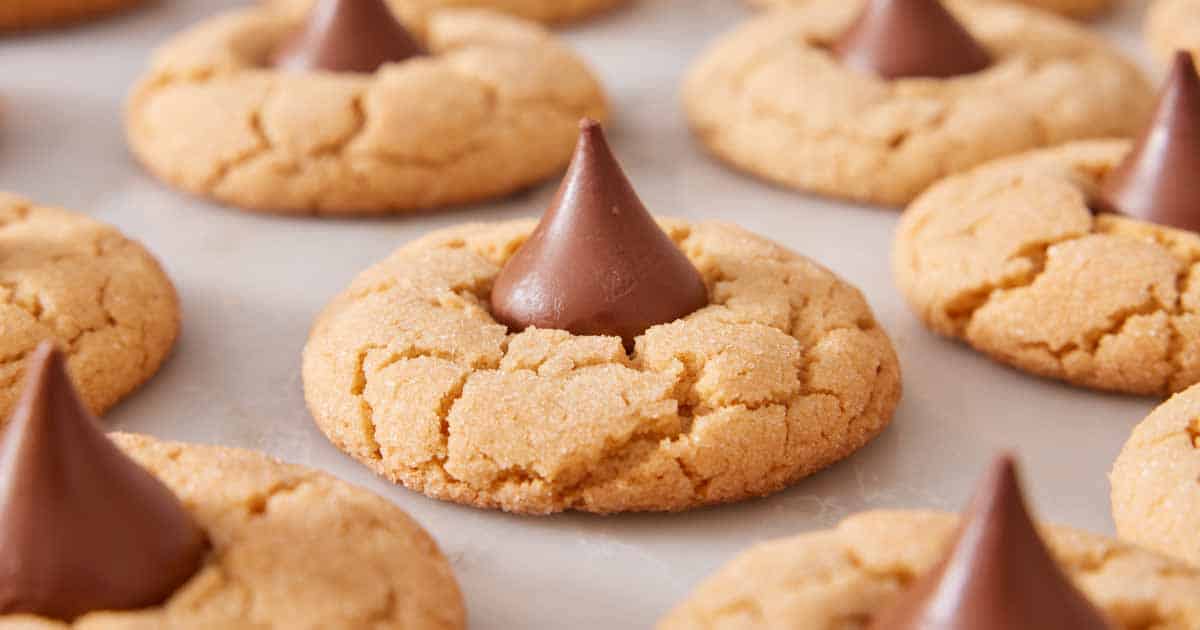
Peanut Butter Blossoms conjures up cherished holiday memories, the sweet aroma of baking, and the delightful anticipation of that first bite. These iconic cookies, with their signature chewy peanut butter base and a soft, chocolatey Hershey's Kiss nestled on top, are more than just a dessert – they're a tradition. While seemingly simple, mastering the perfect batch involves a few strategic choices and expert techniques. This comprehensive guide will walk you through crafting the ultimate
peanut butter blossoms recipe, ensuring every cookie is a symphony of flavor and texture.
The Heart of the Blossom: Smart Ingredient Choices
The foundation of any exceptional cookie lies in its ingredients. For peanut butter blossoms, selecting the right components and understanding their roles is paramount to achieving that beloved texture – a moist, chewy interior with a delicate crisp edge.
The Peanut Butter Predicament: Creamy vs. Natural
This is perhaps the most critical ingredient decision for your
peanut butter blossoms recipe. While the world has embraced natural peanut butter for its healthier profile, it's a non-starter for these cookies. The natural, oil-separated variety tends to make cookies crumbly and dry, and its inconsistent texture can throw off the delicate balance of the dough. For the classic, reliably chewy and moist result, you absolutely need a creamy, no-stir, shelf-stable peanut butter. Think brands like Jif or Skippy – the kind that comes in that iconic blue-lidded jar. Their consistent emulsification ensures the right fat and moisture content for a perfect cookie every time.
Butter's Embrace: Why Softened Butter is Key (and the Shortening Debate)
Many traditional
peanut butter blossoms recipes, including cherished family heirlooms, often call for shortening. While shortening does contribute to an incredibly soft cookie, embracing all-butter has become the preference for many modern bakers, including the Delish test kitchen. Softened, unsalted butter not only imparts a richer, more complex flavor but also creates cookies that are wonderfully moist and possess a desirable chewiness on the inside with a perfectly crisp exterior. The softening process is crucial: it allows the butter to cream effectively with the sugars, incorporating air and building that light, fluffy structure that’s essential for a tender cookie. If your butter is too cold, it won't cream properly; if it's melted, it will result in greasy, flat cookies. Aim for butter that gives slightly when pressed, but isn't oily.
Expert Tip: If you're torn between butter and shortening, or simply curious about the textural differences, delve deeper into the science behind these fats. You might find our detailed guide on the topic illuminating:
Master Chewy Peanut Butter Blossoms: Butter vs. Shortening Guide.
The Sweet Balance: Sugar Symphony & Vanilla's Note
A harmonious blend of brown sugar and granulated sugar is key to the peanut butter blossom's distinctive sweetness and texture. Granulated sugar provides crispness and helps the cookies spread slightly, while brown sugar, with its molasses content, contributes moisture, chewiness, and a subtle depth of flavor. This combination ensures the cookies are "just sweet enough," avoiding an overly saccharine taste.
And don't underestimate the power of pure vanilla extract. A splash of good quality vanilla doesn't just add flavor; it rounds out and enhances the entire profile of the cookie, marrying the sweetness of the sugars with the richness of the peanut butter and butter. It's the unsung hero that adds a touch of warm, floral complexity.
Flour & Fluidity: Mastering Dough Consistency
All-purpose flour forms the structural backbone of your cookies. The most common pitfall here is inaccurate measurement, which can lead to dry, crumbly dough or dense, tough cookies. Always spoon your flour into a measuring cup and level it off with a straight edge; never pack it down or scoop directly from the bag.
Beyond flour, milk acts as a vital liquid component. If, after combining ingredients, your dough feels overly dry or crumbly – often a sign of slightly too much flour or varying moisture in your peanut butter – a little extra milk, added one teaspoon at a time, can be a lifesaver. It helps bring the dough together, ensuring it's pliable and easy to roll without being sticky.
The Iconic Topping: Hershey's Kisses and Beyond
The quintessential finish to any
peanut butter blossoms recipe is the classic Hershey's Kiss. The plain milk chocolate variety is traditional for a reason – its creamy texture and familiar flavor perfectly complement the peanut butter cookie. Added immediately after baking, the residual heat from the cookie softens the chocolate just enough, creating that irresistible gooey center when you take a bite.
However, don't shy away from creativity! While the original is perfection, you can experiment with other Hershey's Kiss variations like dark chocolate, caramel-filled, almond, or even seasonal flavors to put your own unique spin on this classic. For more creative ideas and a deeper dive into this holiday favorite, check out
Bake a Holiday Classic: Our Famous Hershey's Kiss Blossoms Recipe.
Crafting the Perfect Dough: Expert Mixing Techniques
Executing the mixing process correctly is just as important as choosing the right ingredients. Proper technique ensures the ideal texture and prevents common baking woes.
Begin by preheating your oven to 375°F (190°C) and lining two large baking sheets with parchment paper. Parchment paper is invaluable for even baking and prevents sticking, making cleanup a breeze.
In a small bowl, whisk together your dry ingredients: the precisely measured flour, baking soda, and salt. Whisking ensures they are evenly distributed, so your cookies rise consistently.
In a separate, larger bowl, combine the softened butter and creamy peanut butter. Using a handheld electric mixer, beat them together until the mixture is smooth and well-combined. This step creates a cohesive base. Next, add both the granulated and brown sugars, and continue beating until the mixture transforms into a light, fluffy, and noticeably lighter-colored cream. This creaming process is crucial for incorporating air, which contributes to the cookies' tenderness.
Beat in the egg until just combined, then add the milk and vanilla extract, mixing until everything is incorporated. Be careful not to overmix at this stage.
The Art of Gradual Addition: Flour Integration
Now comes a critical step: gradually adding the flour mixture to the wet ingredients. Resist the urge to dump it all in at once. Adding it in two or three stages allows for better control and ensures the dry ingredients are fully integrated without overworking the gluten in the flour.
Don't Overmix! The Golden Rule
Once the dry ingredients are mostly incorporated, beat on low speed *just until the dough comes together*. Overmixing after flour is added develops the gluten too much, leading to tough, dense cookies. The moment you see no more streaks of dry flour, stop mixing. The dough should be soft, pliable, and easy to handle.
Baking Bliss: From Oven to Iconic Treat
With your perfect dough ready, the final steps transform it into those irresistible blossoms.
Shaping, Sugaring, and Spacing
Using your hands, roll approximately 2 tablespoons of cookie dough into a smooth ball. This size ensures a good cookie-to-chocolate ratio. Next, roll each dough ball generously in reserved granulated sugar. This sugar coating not only adds a beautiful sparkle but also creates a delightful textural contrast on the exterior of the cookie. Place the sugared dough balls on your prepared baking sheets, ensuring they are spaced at least 2 inches apart to allow for proper spreading without merging into one giant cookie.
Bake the cookies in your preheated oven for about 8-10 minutes. Look for the edges to be lightly golden and set, while the centers still appear slightly soft. This indicates a perfectly chewy interior.
The Critical Kiss Moment
Immediately upon removing the hot cookies from the oven, gently press a Hershey's Kiss into the center of each cookie. The residual heat will slightly soften the chocolate, allowing it to adhere perfectly and creating that iconic gooey center. If you wait too long, the cookies will cool and the chocolate won't melt as effectively.
Cooling for Perfection: Preventing Smears
Allow the cookies to cool on the baking sheets for a few minutes before transferring them to a wire rack. This initial cooling period helps them set and prevents them from breaking apart. Once on the wire rack, let them cool completely. Patience is key here; rushing the cooling process, especially before the chocolate has fully set, can lead to smeared Kisses or difficulty in stacking. Once fully cooled, the chocolate will be firm, and your blossoms will be ready to stack, store, or, most importantly, devour!
Store your finished Peanut Butter Blossoms in an airtight container at room temperature for up to 5 days, keeping them away from direct sunlight to maintain their freshness and prevent chocolate melt.
Conclusion
The perfect
peanut butter blossoms recipe is within reach when you pay attention to these smart ingredient choices and expert dough tips. From selecting the creamiest peanut butter to mastering the art of gentle mixing and the timing of that iconic chocolate kiss, each step contributes to the ultimate cookie experience. Whether you're continuing a cherished family tradition or starting a new one, these cookies are guaranteed to bring smiles, warmth, and a taste of pure nostalgia to any occasion. Happy baking!